Back to Facility Schedule Main Menu
If you need to check the calendar before submitting your requests, click on the link below once you are logged in. It will take you right to the Month View calendar. The calendar may not display any events at first. Select an option from the Location drop down menu, then click Refresh Calendar. You can also filter your calendar view according to Room, Organizations, etc.
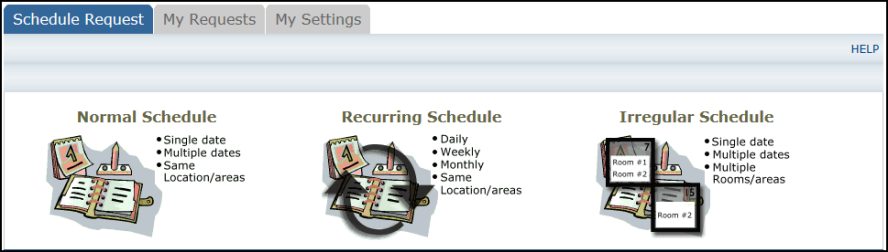
- Click on the Schedule Request tab. Select one of the three schedules types:
- Normal Schedule: Most commonly used. Up to 20 event dates can be selected. This schedule is used when all event dates will share the same time and room(s).
- Recurring Schedule: Up to 100 events can be added. This schedule is used for events that follow a pattern (ie, every Monday and Wednesday for a semester or the third Friday of the month for the entire year). All event dates will share the same time and room(s).
- Irregular Schedule: Up to 20 event dates can be selected. This schedule type can be used when each event will take place in a different room and/or a different time slot than the other event dates on the schedule. For example: the Boy Scouts will use the Gym on January 1st from 9am - 12pm and their next meeting will take place on January 31st in Room 200 from 1pm - 2pm.
- When entering a schedule, any field with an orange vertical line beside it is a required field. The system will not save your request if the information is not filled out.
- The Booked by fields will already be filled in with your information.
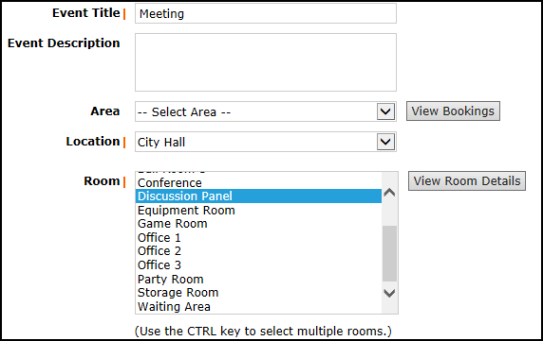
- Enter the Event Title.
- Click on the drop down menus or binoculars beside Location and Rooms to select the spaces that are needed.
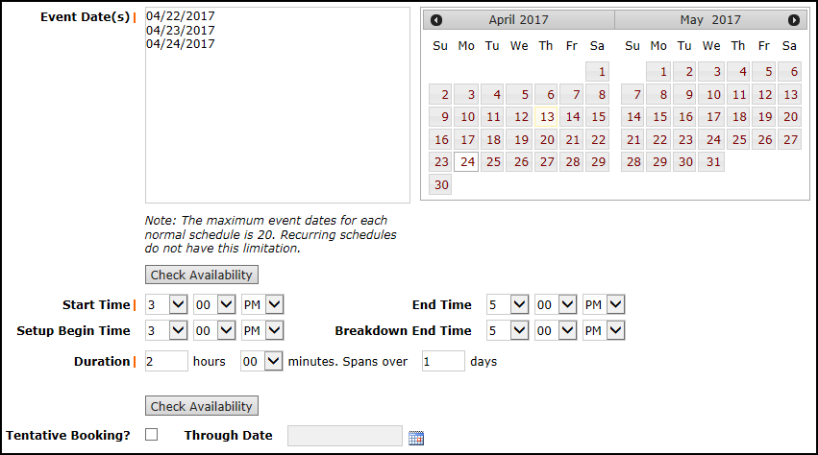
- Choose your Event Dates by clicking on the date in the calendar box to the right. You can click on the arrows in the calendar box to select a different month.
- Enter the Start Time and End Time and make sure that you are selecting AM or PM for the correct time of day. You may select a different Setup Begin Time or Breakdown End Time if needed.
- Do not change the Duration or Spans over fields. These will calculate for you based on the Start and End Times that you enter. Spans over is left as 1 day unless you are requesting an overnight event.
- Click on the Check Availability button to verify that you are not double booking a room.
- Enter any Additional Information, Organization Information, Insurance Information, Setup Requirements, and Rental Requests that may appear on the form. Remember to fill in all required fields marked with an orange vertical line.
- Click Save to submit your request.
- The Booked by fields will already be filled in with your information.
- Enter the Event Title.
- Click on the drop down menus or binoculars beside Location and Rooms to select the spaces that are needed.
- Choose your Event Dates by clicking on the date in the calendar box to the right. You can click on the arrows in the calendar box to select a different month.
- Enter the Start Time and End Time and make sure that you are selecting AM or PM for the correct time of day. You may select a different Setup Begin Time or Breakdown End Time if needed.

- Do not change the Duration or Spans over fields. These will calculate for you based on the Start and End Times that you enter. Spans over is left as 1 day unless you are requesting an overnight event.
- Enter the Start Recurrence date.
- Choose your Recurrence Pattern.
- Select Daily if your event will every day between the Start and End Recurrence dates.
- When you choose Weekly, you can select if the event occurs every week, every two weeks, etc. Then, check the box next to the day(s) of the week that the event will occur.
- When you choose Monthly, you can select the day of the month (ie, the 15th day of every 1 month) or you can choose the weekday of the month (ie, the second Monday of every 1 month).
- Enter the End Recurrence date.
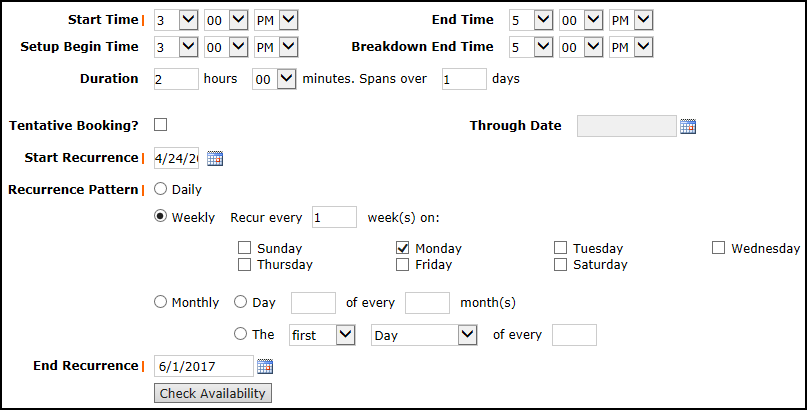
- Click on the Check Availability button to verify that you are not double booking a room.
- Enter any Additional Information, Organization Information, Insurance Information, Setup Requirements, and Rental Requests that may appear on the form. Remember to fill in all required fields marked with an orange vertical line.
- Click Save to submit your request.
- The Booked by fields will already be filled in with your information.
- Enter the Event Title.
- Select the Location you would like to reserve for your event.
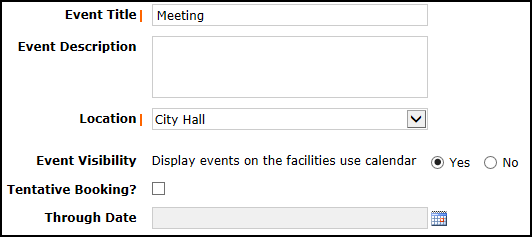
-
Enter any Additional Information, Organization Information, and Insurance Information that appear on the form. Remember to fill in all required fields marked with an orange vertical line.
- In the Events section, select the Room(s), Date, and Start and End Time for each event date. You can enter three dates at a time. To add more events, click Save in the Events section. The screen will refresh with fields to enter more dates.
- Do not change the Duration or Spans over fields. These will calculate for you based on the Start and End Times that you enter. Spans over is left as 1 day unless you are requesting an overnight event.
- Click on the Check Availability buttons to verify that you are not double booking a room.
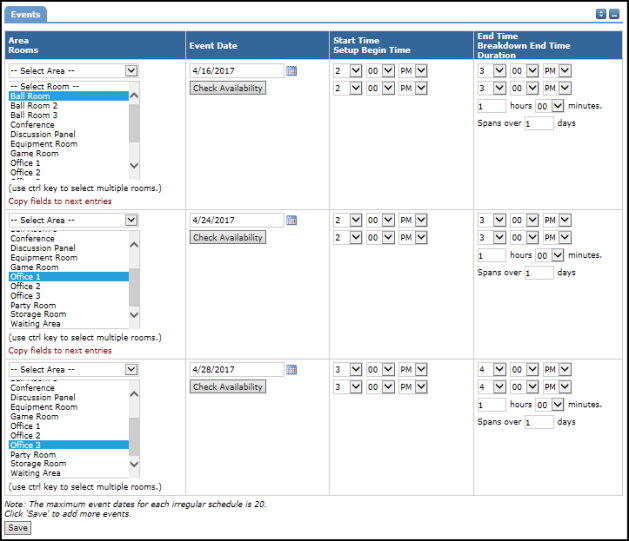
- Enter any Setup Requirements and Rental Requests that may appear on the form.
- Click Save at the bottom of the form to enter your request.
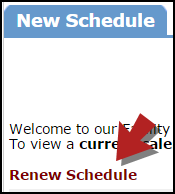
*Note: If you have multiple schedule requests to enter at one time, you can use the Renew feature to save you time. Once you have submitted the first request, scroll to the top of the screen and click on Renew Schedule. This feature acts as a copy button and will copy all the information, except for event dates, from the schedule that you just submitted into a new schedule request form. Because it is a new schedule, you will be able to update any of the necessary fields and add the new event dates. If you do not click Renew or start on a brand new form, you will overwrite your original request.